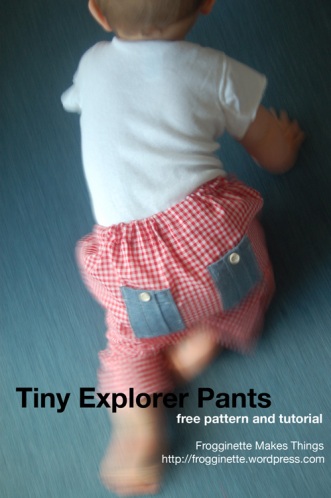
I wanted simple pants for my almost 1-year-old that could be sewn during nap time but still have cute details. They had to be comfortable and roomy in the diaper area but not ride up the leg when crawling. I could imagine a hundred customizations of this very basic pattern! I hope you’ll have fun with it 🙂
Pour le tuto en français et le patron, cliquez ici!
Click here for pattern. Scroll down for step-by-step tutorial:
PLEASE NOTE: I’ve made this pattern available for free for your personal, non-commercial use. I hope you enjoy it! Please don’t post, copy or distribute any elements of this pattern (including the photos). Instead, please link back to my blog, Frogginette Makes Things, https://frogginette.wordpress.com. You can post the main pattern photo as long as you link back/give credit.
Please email me at lchemery(at)hotmail(dot)com if you find any errors, thank you!!
You will need:
- – a printer and 3 sheets of A4 size (i.e. “regular” sized) paper. A word of caution: set page scaling to “none” in the print window to ensure that the pattern gets correctly printed.
- – about 1/2 yard of fabric + scraps for pockets and tabs if you want to make them from contrasting fabric
- -1/2” to 3/4” wide elastic for waistband: the length I used was 19”, which is my son’s waist measurements minus 1″ (for optimal fit, measure it on your child)
- – 4 buttons: 2 for pockets, 2 for tabs
- – safety pin to insert elastic band into casing
- – thread / pins / scissors…
Note about size: This pattern is intended for 1-year old babies. I’m sorry I don’t have the time or skills as of yet to grade this pattern and offer more sizes. However, it would be very easy to modify it for slightly older or younger babies (probably from 6 months to 2 years old): 1) adjust length of elastic to fit your child at waist 2) just add (for bigger size) or substract (for smaller size) 1 to 2” from leg length, pant width and crotch rise.
INSTRUCTIONS:
1- Print out and cut all pattern pieces and tape pant pieces together along lines A and B
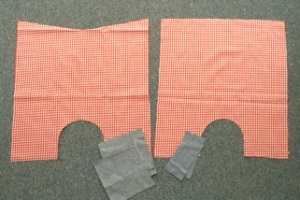
2- Place assembled pattern along fabric fold, cut back side of pant (seam allowances are already included). Fold top of pattern piece along diagonal fold line, place pattern along fabric fold, cut front side of pant. (Tip: if you want, you can then make the “V” at the front of the pants slightly rounder, it will make it easier to do the waist casing.)
3- Cut 2 pockets and 2 side tabs (seam allowances are already included).
You should have 6 pieces total: front, back, 2 pockets, 2 tabs.
4 – To make pocket (repeat twice):
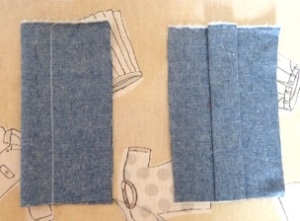
Fold pocket in half (wrong sides together) and sew down 1” from folded edge (as shown on left-hand side on below pic). Then open and press the tube you’ve sewn down:
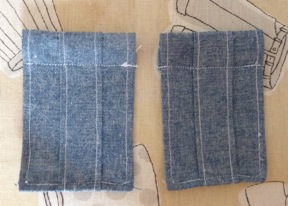
Fold 1/2” under the sides, then bottom of the pocket, press down and sew the hem in place about 1/4” from edge. Then fold top of pocket under 1/4”, then 1”, press down and sew the hem in place across the pocket width, about 3/4” from top of pocket:
Note: I didn’t make any buttonholes since the pockets are not functional, but you could easily add some at this stage!
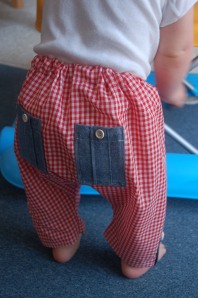
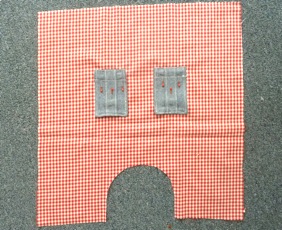
5- Pin pockets to back of pants (on right side of fabric). I placed mine approximately 4” above crotch and 4.5” from side edges:
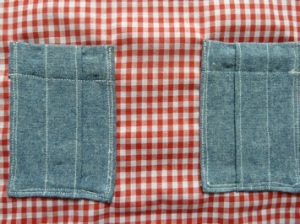
Sew pockets onto pants along outside of topstitched line:
6- Make tabs (repeat twice): fold each tab lengthwise with right sides of fabric together and press down. Sew 1/4” down length, then across. Clip corners. Turn the tube you’ve made inside out, and tuck in the raw edge 1/4”. Press down. Sew all around, 1/4” from edges.
7- With right sides of fabric together, sew front and back of pants together along side seams, 1/4” from edges. Serge or zigzag raw edges to prevent fraying.
8- Hem pant leg by folding 1/4” under twice and sewing hem into place. Do this for each leg.
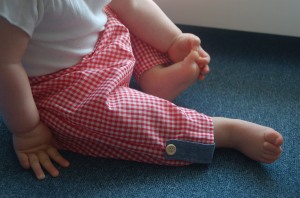
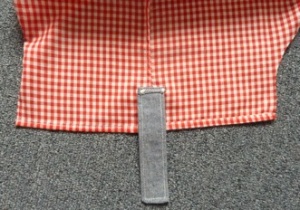
9- Open pant side seam and with wrong side facing you, pin tab over seam so that slightly more than half of tab sticks out, as shown in below photo. Sew top of tab to pant leg. Do this for each tab. (Note: as with the pockets, I didn’t make any buttonholes but you could easily add some at this stage)
10- With pants inside out, sew 1/4” along crotch seam. Serge or zigzag raw edges to avoid fraying:
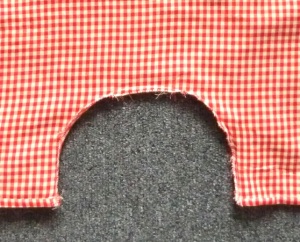
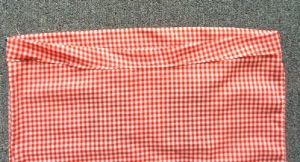
11- With pants still inside out, fold under 1/4”, then 1 1/4” for hem. Press down, making sure that front curves and dips evenly. Sew around hem, leaving an opening of about 2”:
12: Using a safety pin, insert elastic inside of casing through opening. Zigzag ends of elastic together. Make sure the elastic is not twisted. Turn pant inside out, sew buttons onto side tabs and pockets. Voilà!

C’est adorable!! En effet parfait pour la Normandie;) Nous on repart demain pour les US apres un petit passage Normand, avec notamment un we ensoleille familial dans l’ile de Chaussey, on a adore!
Bisous!
These pants are so cute! But when I sewed them up, the rise was much shorter than yours– it didn’t cover his diaper! I was sure to print it out at 100%– what could I have done wrong?
The pants came out cute but i also had a problem with the rise 😦 it came out too short.
Pingback: 40 Adorable DIY Baby Sewing Patterns Anyone Can DO - DIY & Crafts
Pingback: FREE baby clothes patterns (Sewing) | MumsMakeLists
Pingback: FREE baby clothes patterns (Sewing) - Our Live Demo